
Tubeless Tyres, The Benefits and How to Do It

In the ever-evolving realm of mountain biking, enthusiasts and professionals alike continually seek innovations that enhance their riding experience and performance on the trail. One such advancement that has gained significant traction in recent years is the adoption of tubeless tire systems. Breaking away from traditional tubed setups, running tubeless tires on mountain bikes has emerged as a game-changer, promising a plethora of benefits that extend beyond mere convenience. As riders increasingly embrace this technology, it's essential to delve into the advantages that make tubeless tires a transformative choice for those seeking to elevate their off-road adventures. From improved puncture resistance to enhanced traction and a smoother ride, the advantages are as diverse as the terrain these riders conquer. Join us as we explore the compelling reasons why more mountain bikers are making the switch to tubeless, discovering a new realm of performance and reliability on the trail.
Enhanced Puncture Resistance: Tubeless tires significantly reduce the risk of flat tires caused by punctures, a common concern for mountain bikers navigating challenging terrains. With no inner tube to pinch or puncture, riders experience enhanced puncture resistance, allowing them to confidently tackle rocky, root-strewn trails without the constant worry of a flat. The sealant within the tubeless system quickly seals small punctures, ensuring a more robust and reliable riding experience. This increased resistance to flats means less downtime on the trail and more time enjoying the ride.
Improved Traction and Control: Tubeless tires allow riders to fine-tune tire pressure more precisely, optimizing traction and control on varied terrains. Lowering the tire pressure enhances grip by allowing the tire to conform to the irregularities of the trail, providing a more secure connection between the tire and the ground. This improved traction is particularly beneficial when navigating technical descents, loose gravel, or slippery surfaces. With better control over tire pressure, mountain bikers can tailor their setup to the specific demands of the trail, resulting in a more confident and responsive ride.
Smoother and More Comfortable Ride: The absence of an inner tube not only reduces the risk of pinch flats but also contributes to a smoother and more comfortable ride. Tubeless systems allow riders to run lower tire pressures without compromising performance, providing increased shock absorption and reducing vibrations. As a result, riders experience less fatigue during extended rides, enjoy improved comfort over rough terrain, and maintain better overall control. The combination of lower pressures and enhanced shock absorption translates into a more enjoyable riding experience, especially on long rides or during endurance events.
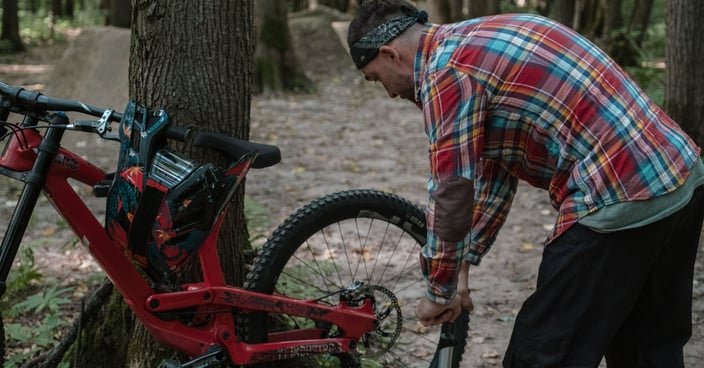
Making the switch to a tubeless tire setup on your mountain bike can be a game-changer in terms of performance and reliability on the trail. Here's a comprehensive step-by-step guide to help you navigate the process seamlessly:
Materials Needed:
Tubeless-ready tires
Tubeless-ready rims
Tubeless valve stems
Tire sealant
Tubeless tire lever
Floor pump or tubeless inflator
Wrenches
Rim tape (if not already tubeless-ready)
Step 1: Gather Your Tools and Materials
Ensure you have all the necessary materials listed above before starting the conversion process. Having everything ready will streamline the installation and minimize downtime.
Step 2: Remove the Existing Tires and Tubes
Take off your current tires and tubes. Use tire levers to carefully pry the tires off the rims, and remove the inner tubes. Inspect the rims for any sharp objects or debris that could cause punctures.
Step 3: Install Tubeless-Ready Tires
Mount the tubeless-ready tires onto your rims. Ensure they are seated evenly and properly aligned. If your rims are not tubeless-ready, add tubeless rim tape to create an airtight seal. The tape should cover the spoke holes completely.
Step 4: Insert Tubeless Valve Stems
Remove the valve core from each tubeless valve stem and insert them through the valve holes in the rim. Tighten the locknut securely from the inside of the rim.
Step 5: Add Tubeless Sealant
Using a suitable injector or the recommended method for your sealant, add the appropriate amount of sealant into each tire. This liquid sealant helps seal punctures as they occur during your rides.
Step 6: Seat the Tire Beads
Place one side of the tire bead onto the rim, making sure the valve stem is not obstructed. Using a floor pump or tubeless inflator, inflate the tire gradually. Listen for two distinct "pops" as the beads seat onto the rim. If the beads don't seat easily, you may need to use a compressor or a burst of high-pressure air.
Step 7: Shake and Spin
After seating the beads, shake and spin the wheel to distribute the sealant evenly inside the tire. This ensures that the sealant can effectively seal any punctures that may occur.
Step 8: Check and Adjust Tire Pressure
Verify that the tire is seated correctly on the rim, and then adjust the tire pressure according to your riding preferences and the recommended pressure range for your tires.
Step 9: Test for Leaks
Submerge the wheel in water or use a soapy water solution to check for any leaks around the bead and valve areas. If bubbles appear, address the issue by adjusting the tire bead or tightening the valve stem.
Step 10: Fine-Tune and Enjoy
Fine-tune your tire pressure based on your riding style, preferences, and the type of terrain you'll be tackling. With your new tubeless setup, you're now ready to hit the trails with enhanced performance and the added confidence of a reduced risk of flats.